HI! Do you need a teacher gift?! Here is an idea if you do.
I have made several of these to give as teacher gifts and I have loved making each one. I came up with the pattern by looking at several pencil bags on pinterest and then I combined ideas to get this pattern.

Cut list:
(2) 2 1/2 x 2 1/2 background
(1) 1 1/2 x 4 1/2 black (lead)
(1) 1 1/2 x 4 1/2 tan (wood)
(2) 1 1/2 x 2 1/2 (wood)
(4) 1 1/2 x 1 1/2 yellow (pencil)
(2) 1 1/2 x 5 1/2 yellow (pencil)
(1) 2 1/2 x 5 1/2 yellow (pencil)
(1) 1 1/2 x 4 1/2 grey (metal)
(1) 2 x 4 1/2 pink (eraser)
*Un-finished 4 1/2 x 11 inches

1. Sew the(1) black 1 1/2 x 4 1/2 piece to the (1) tan 1 1/2 x 4 1/2 piece. Press.

2. Take the above unit and (2) 2 1/2 x 2 1/2 background pieces and make one flying geese unit.

Sew, trim, press.

Add the second square to the flying geese unit.

Sew, trim. press.

After pressing it should look like this.

3. Take (1) 1 1/2 x 2 1/2 tan piece and (2) 1 1/2 x 1 1/2 yellow pieces and make a flying geese unit. *make 2
This picture shows the fabric right sides together.

sew and trim...

press...

Add the second square to your flying geese units. Sew and trim.

Press the 2 flying geese units.

4. Sew the 2 flying geese together like above.
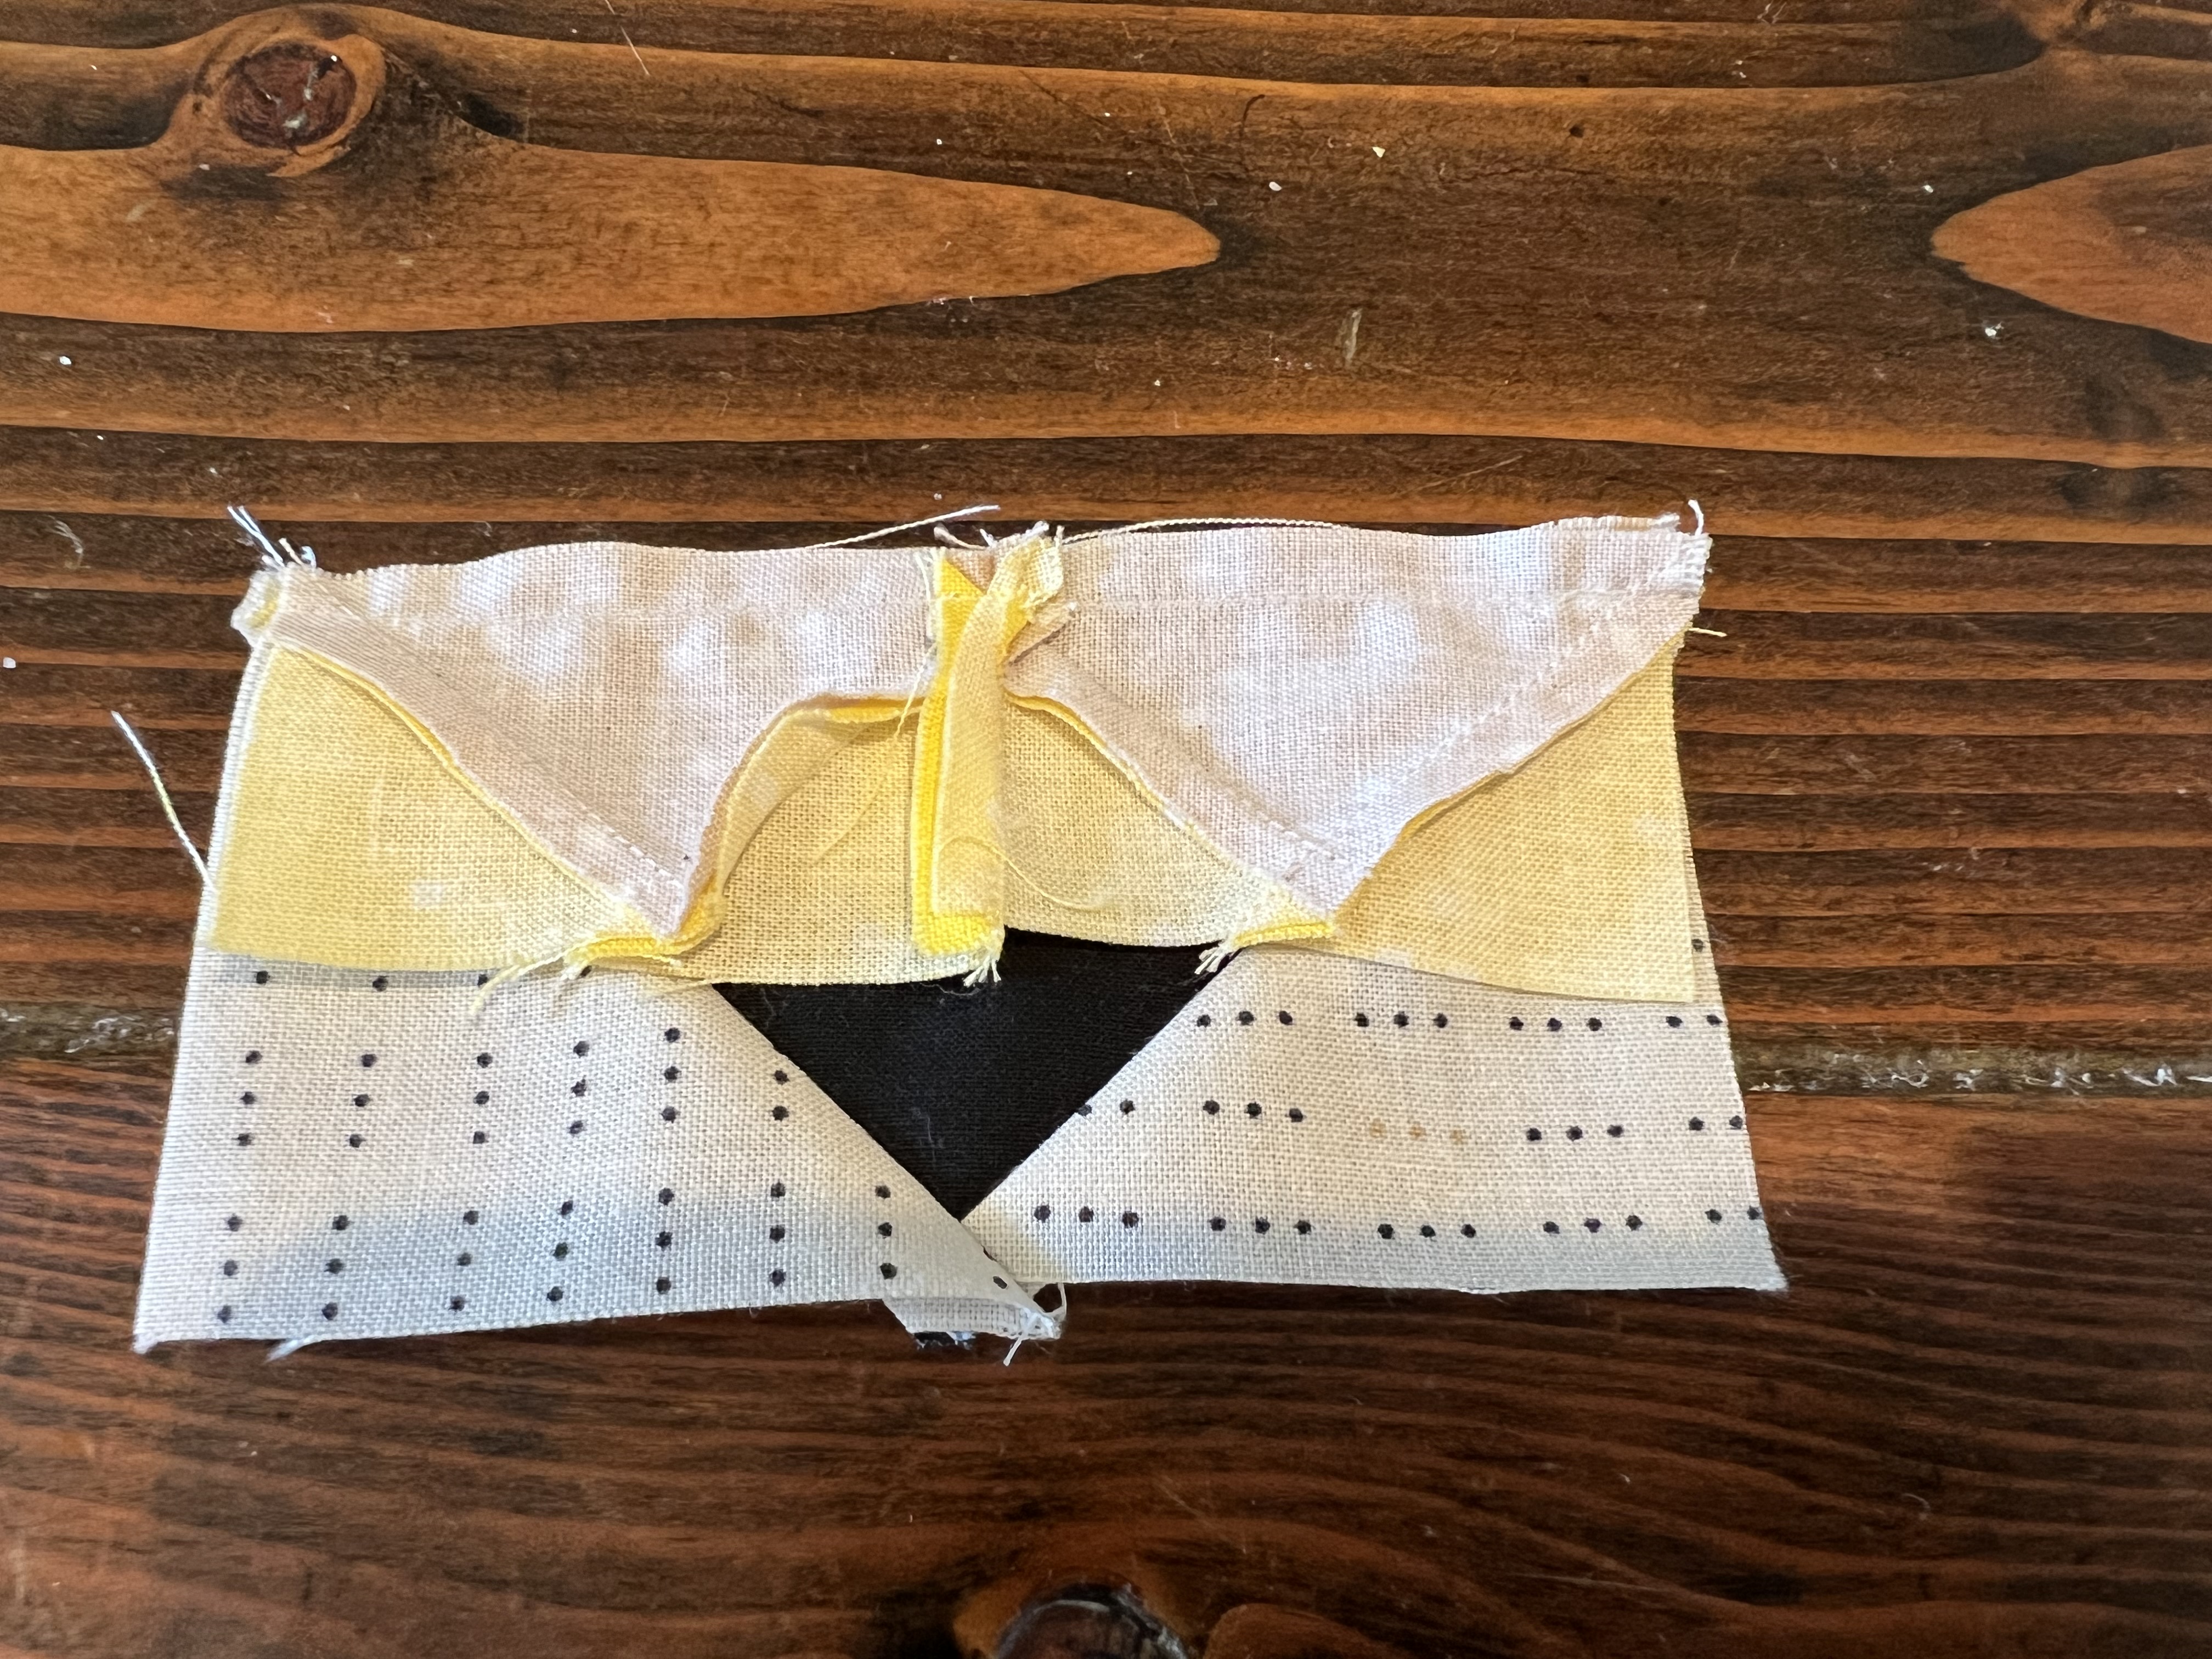
5. Take the unit from step #1 and step #4 and sew together as pictured to get the pencil point.

6. Sew (2) 1 1/2 x 5 1/2 yellow pieces and (1) 2 1/2 x 5 1/2 piece together with the wider piece in the middle. Press.

After pressing...

7. Sew (1) 1 1/2 x 4 1/2 grey piece to (1) 2 x 4 1/2 pink piece and press.


After pressing...

Layout all pieces from the above steps as pictured.

Sew all the pieces together and press.
Your pencil block is DONE!

Here are the pencil blocks I made.

I took each block and turned it into a pencil pouch.

I love how these turned out! They would be so cute as a pillow too!
Have a good day, and I hope you get to sew something today.
Comments
Post a Comment
Thanks so much for leaving me a comment and reading my blog! I love hearing your many comments. :)